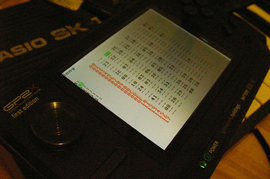
Tutorial: Using Soundfonts in Littlegptracker
 Updated 04/02/15: Fixed errors, adding some additional information. One of the more overlooked (and unknown) features of Littlegptracker is it’s ability to use soundfonts for audio sources. To help clarify things up I decided to put together a short how-to to cover how it works.
Getting Started
If you have read the links above you already know what soundfonts and littlegptracker (piggy) are, so let’s focus on what the implementation is like and what you can do. The piggy sample browser does not yet support soundfont browsing, so to create a project you will need:
- To manually create a folder: ex. lgpt_Soundfonts
- In this folder create a subfolder name: samples
- In this folder copy one soundfont.
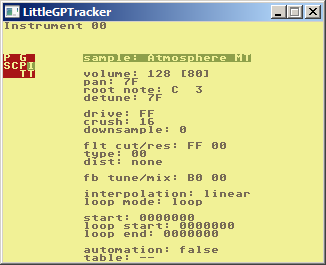
I have posted an example project with samples from the MT-32 here: http://hexawe.net/mess/sf2/lgptMT32.zip You can just unzip and drop this in your project folder to try it out. When you start your piggy project for the first time you will find that whatever soundfont you have loaded now has its instruments assigned to each piggy instrument.  There are a few features/drawbacks you should be aware of.
Features
- If the soundfont has loop points they are automatically selected. You will need to do your own vol fades and kills in the pattern to stop the loop from playing.
- You can adjust the pitch of the sample playing back by adjusting ROOT NOTE.
- Instruments that are multisampled will be layered across the range of the keyboard per the soundfont settings. Drum kits for example will be assigned to each note. String samples will be correctly assigned so the better the quality of your soundfont the more realistic your sample will be.
- You still have the full assortment of bit reducing, and filter options to mangle the sound.
- You can use a combination of soundfont and midi instruments in your project.
- You can change the soundfont sample assigned to each instrument if you want to create different instruments with different filter or panning options. Try adding a filter cut to a cello sound to make it sound like it is coming from farther back in the “room”.
- You can purge instruments to free up instrument slots, the soundfont instruments are still available in your sample pool when browsing.
- All of your non loop based piggy effects commands work, pan, filters, retrig .. go nuts!
Drawbacks
- You cannot delete or add samples to the soundfont once you start editing it seems. You can always add or remove samples to your font using a tool like Vienna for windows or Polyphone for osx
- Larger soundfonts will load slow on handheld devices (sorry psp users!).
- You cannot purge soundfont samples you don’t use from the project to reduce folder size
- Piggy does not support advanced soundfont features like reverb, chorus, or advanced modulations or articulations.
- It will not honor release points, so you have to fade out the loop part, which may sound weird in some fonts
- You can only load three soundfonts per project (but each font can have up to 128 instruments!)
That is basically all there is. There are millions of soundfonts available on the net, so feel free to experiment and report bugs and weirdness on the Piggy mailing list or official forum. To get you started check out this zip of old school soundchip emulation hosted by the fiends at HEXAWE. http://hexawe.net/mess/sf2/oldschool.zip